ALLFLESH DIY INSTRUCTIONS
Step 1
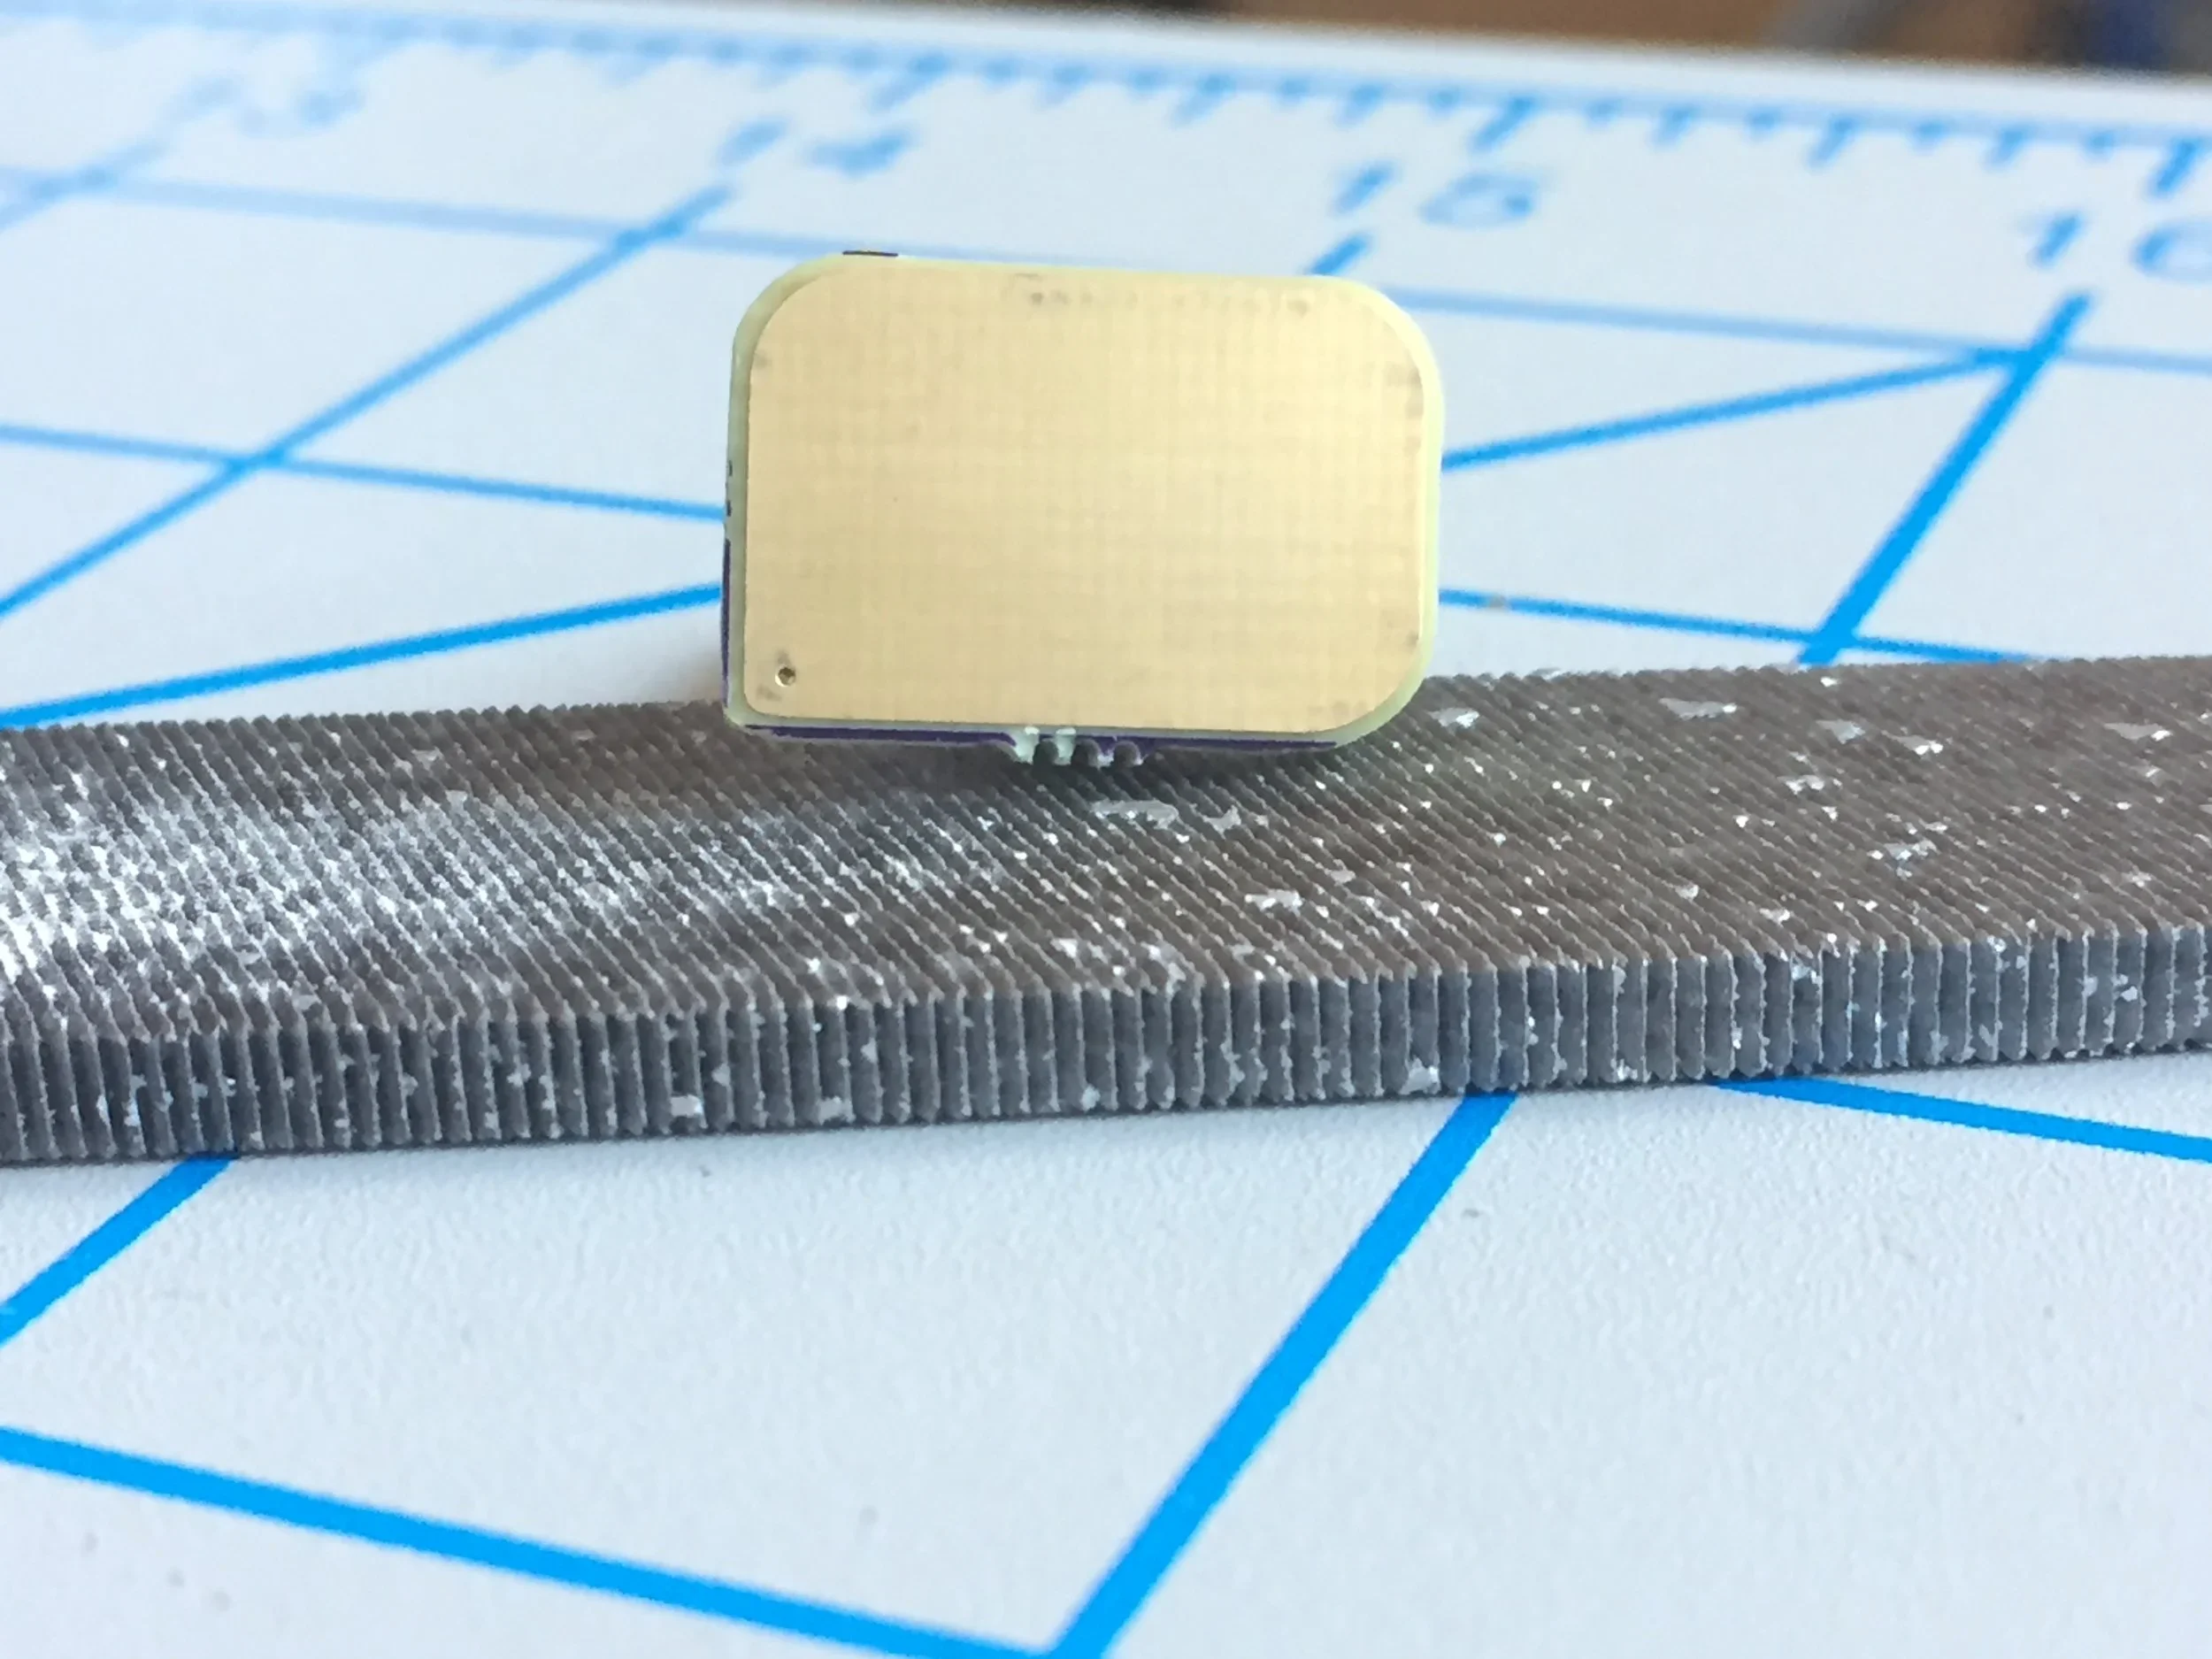
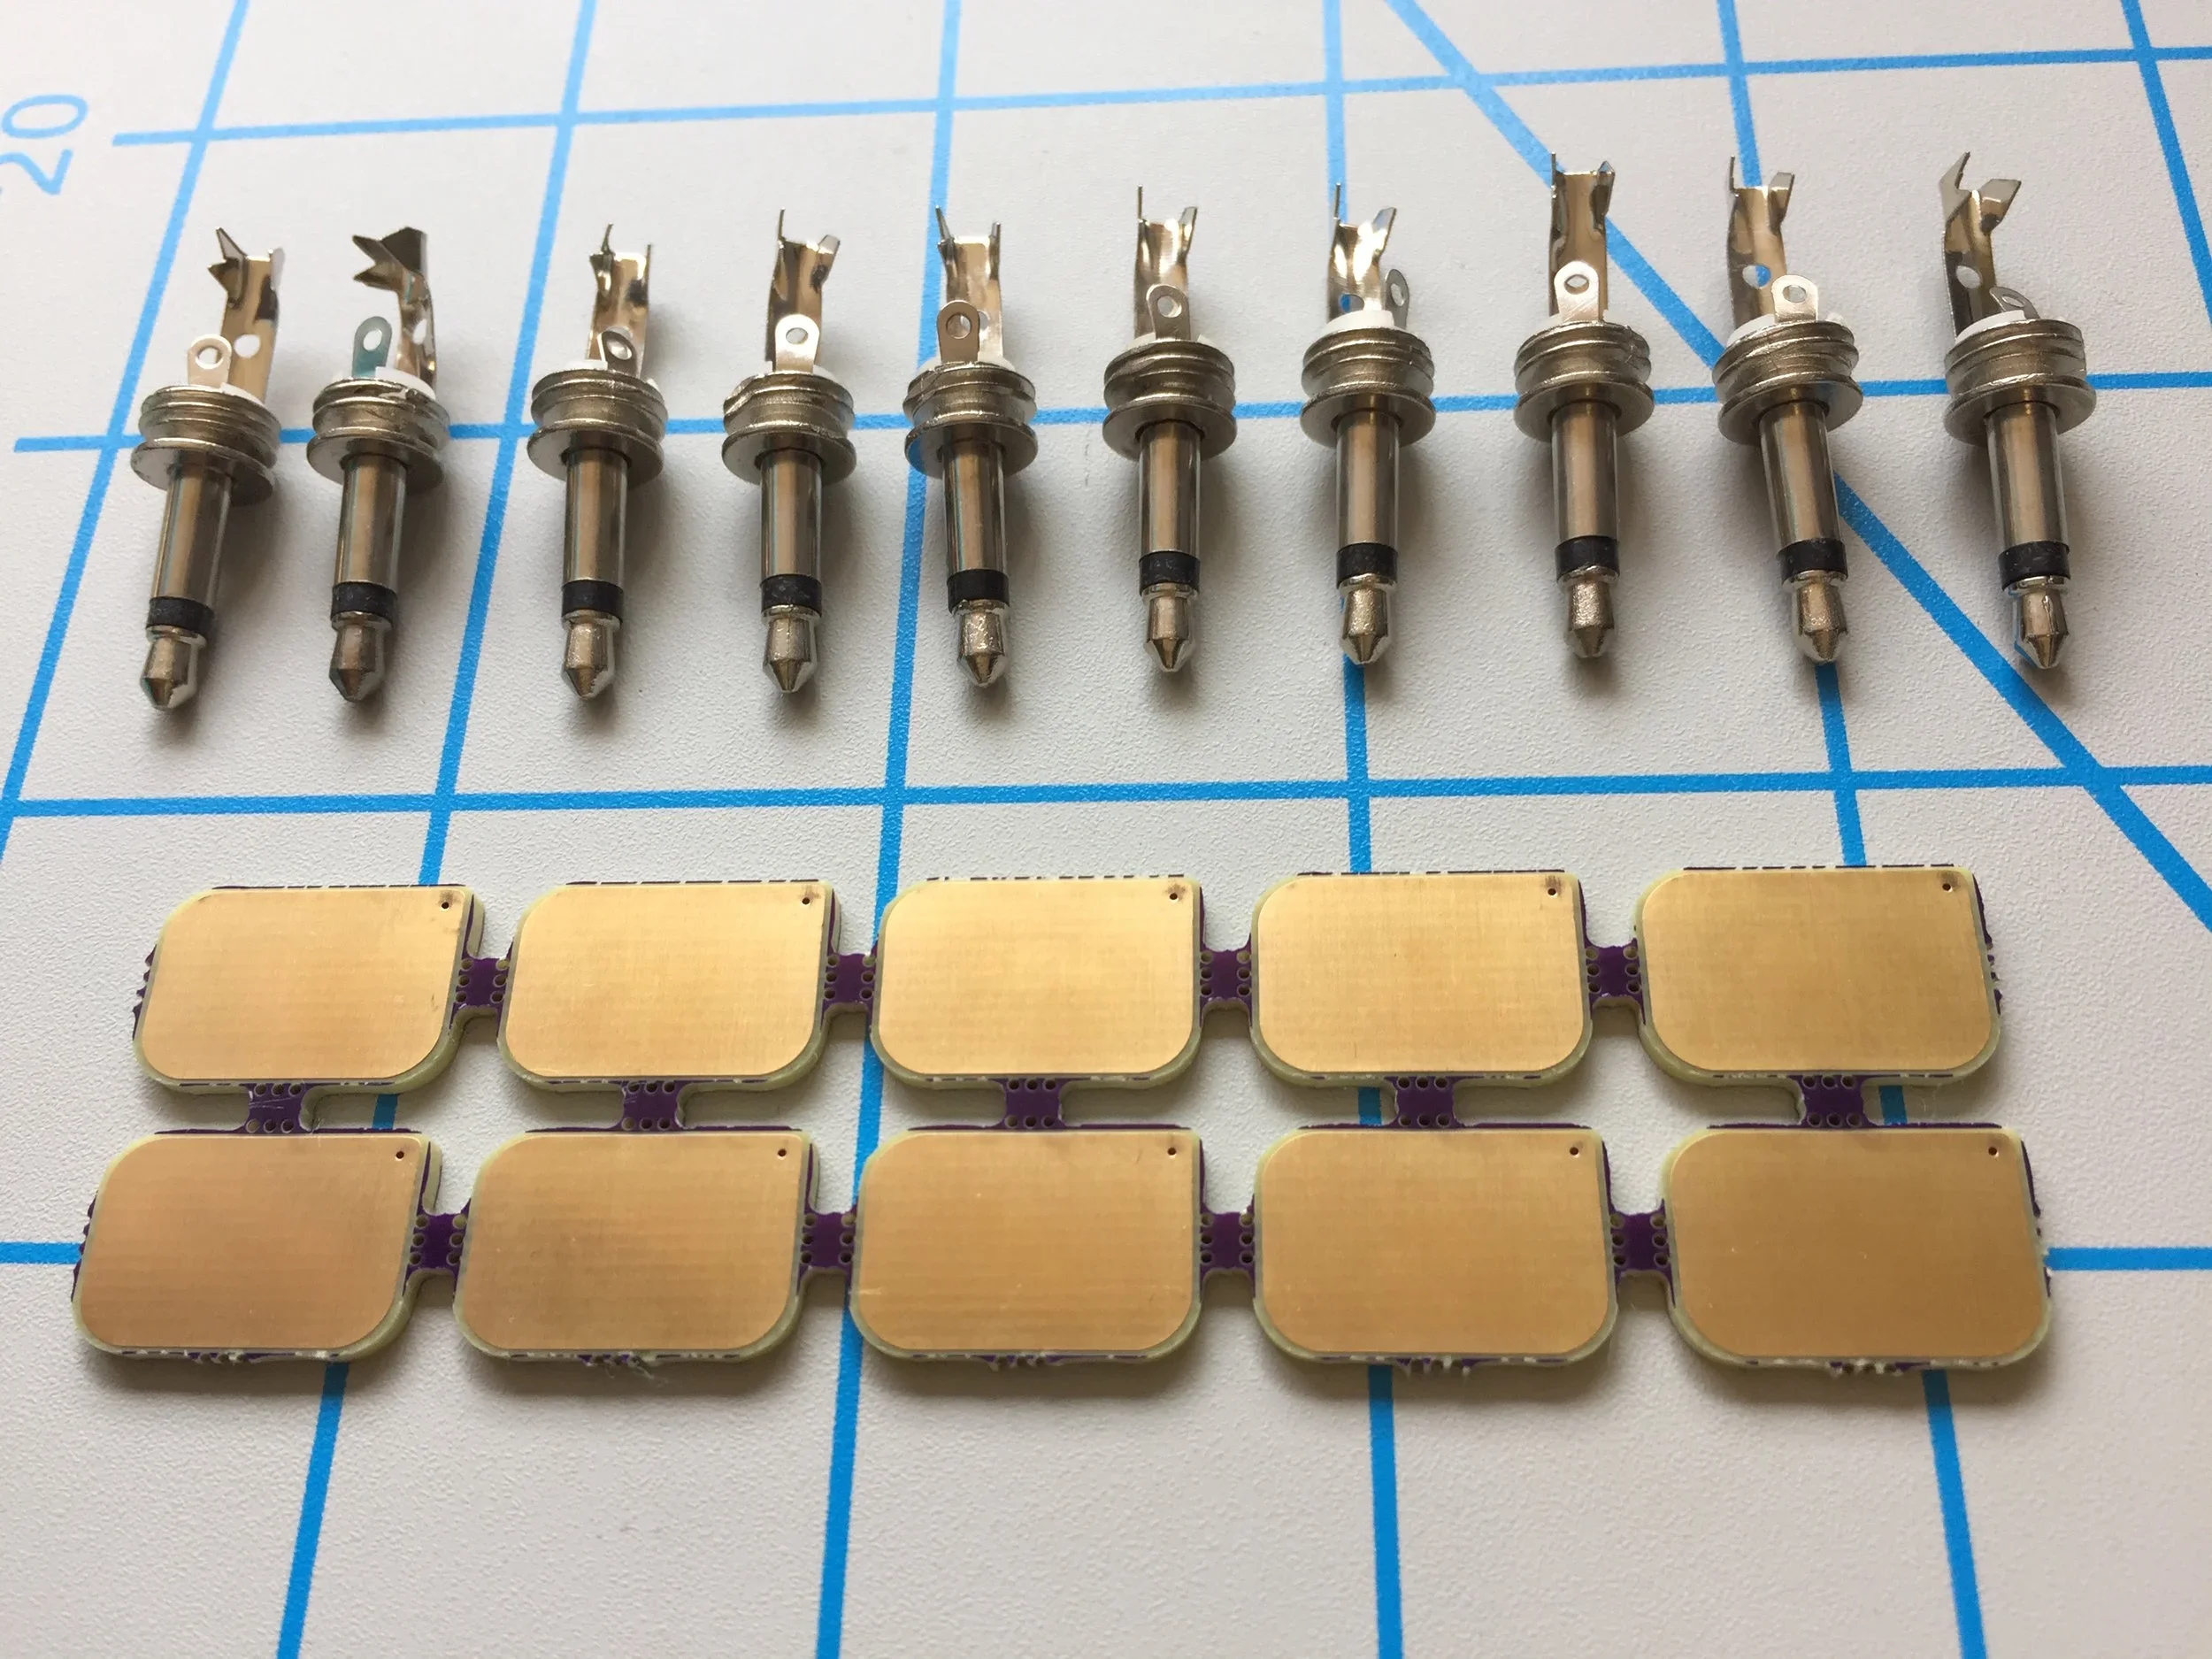
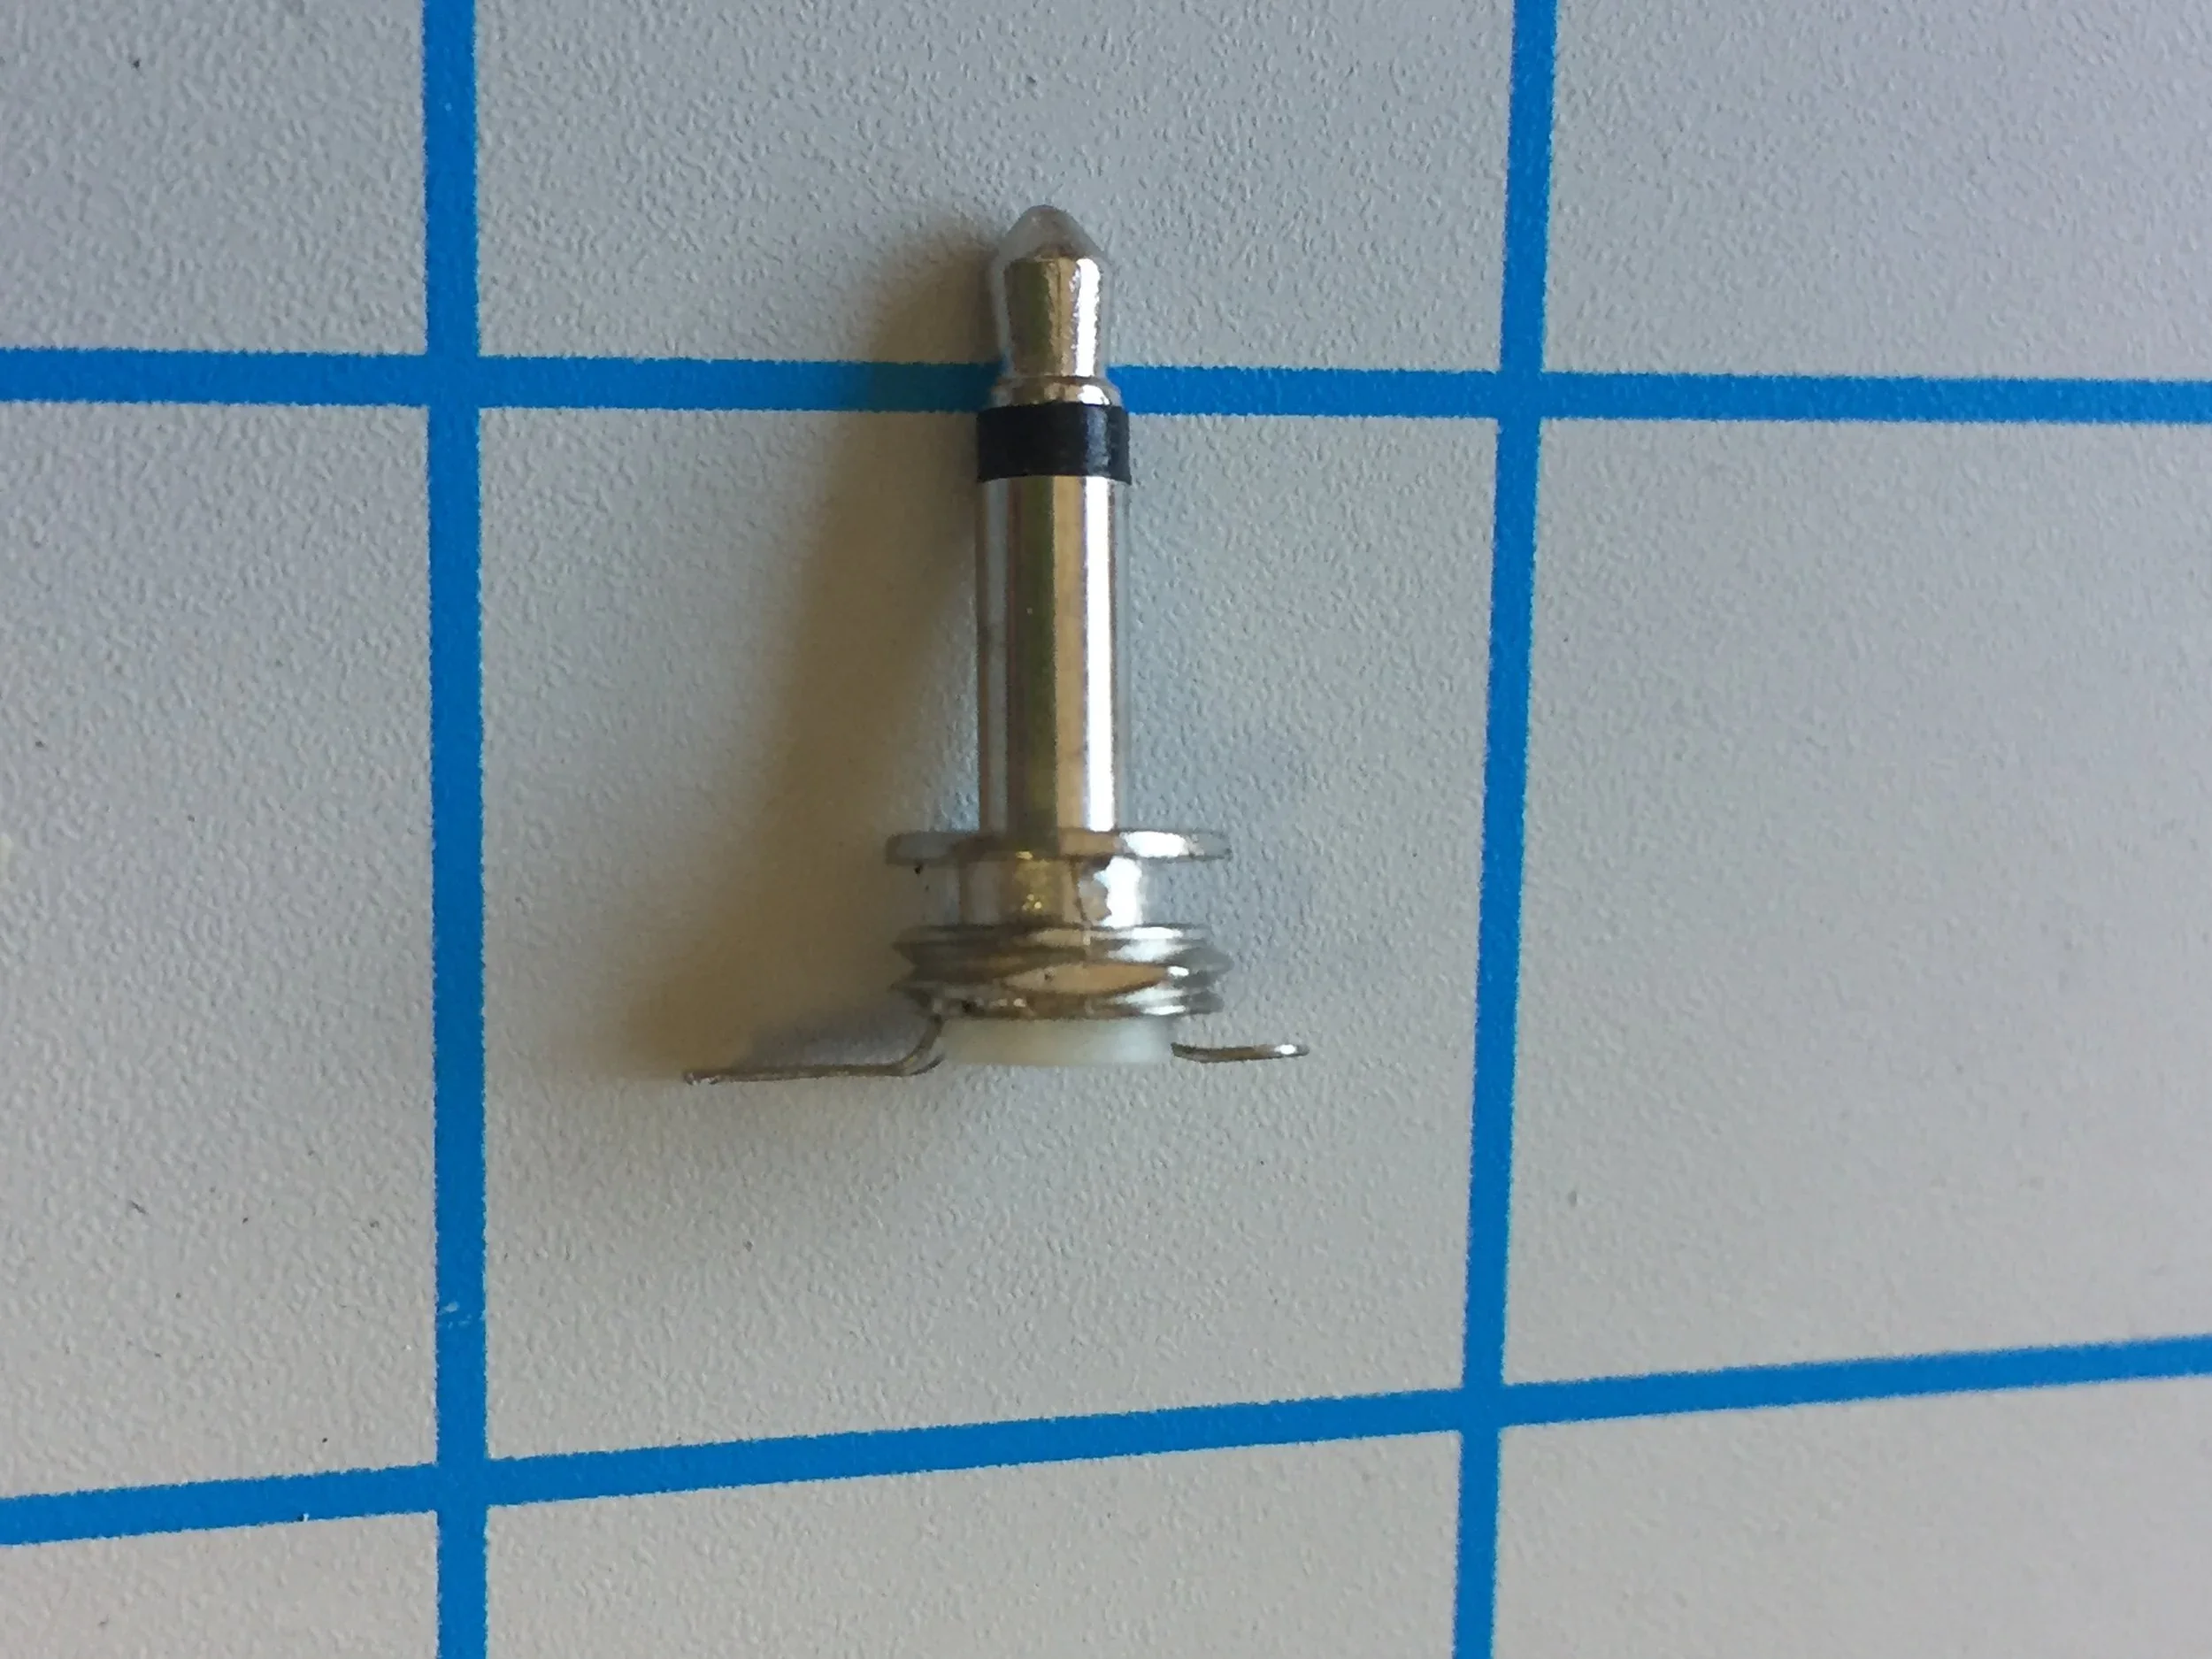
You will need: safety glasses, a soldering iron, solder, clippers, and a file. Unpack the kit, double checking that you have 10x 3.5mm mono plugs and 10x AllFlesh pcbs.
Using clippers (or your hands), break apart all 10 PCBs at the perforation marks and remove any remaining small tabs. (Note: I have not done that in my photo examples but this will help you in later steps to not damage your solder joints). Unscrew the mono plugs from their black plastic housings.
**Though I don’t love leaded solder, it can be very beneficial for learning soldering, and in this instance especially so, because the melting point is low. Leaving the iron in contact with the solder lugs for too long or making the iron too hot can ruin the plug internals**
If you have any questions or issues please reach out through the contact page below.
Step 2
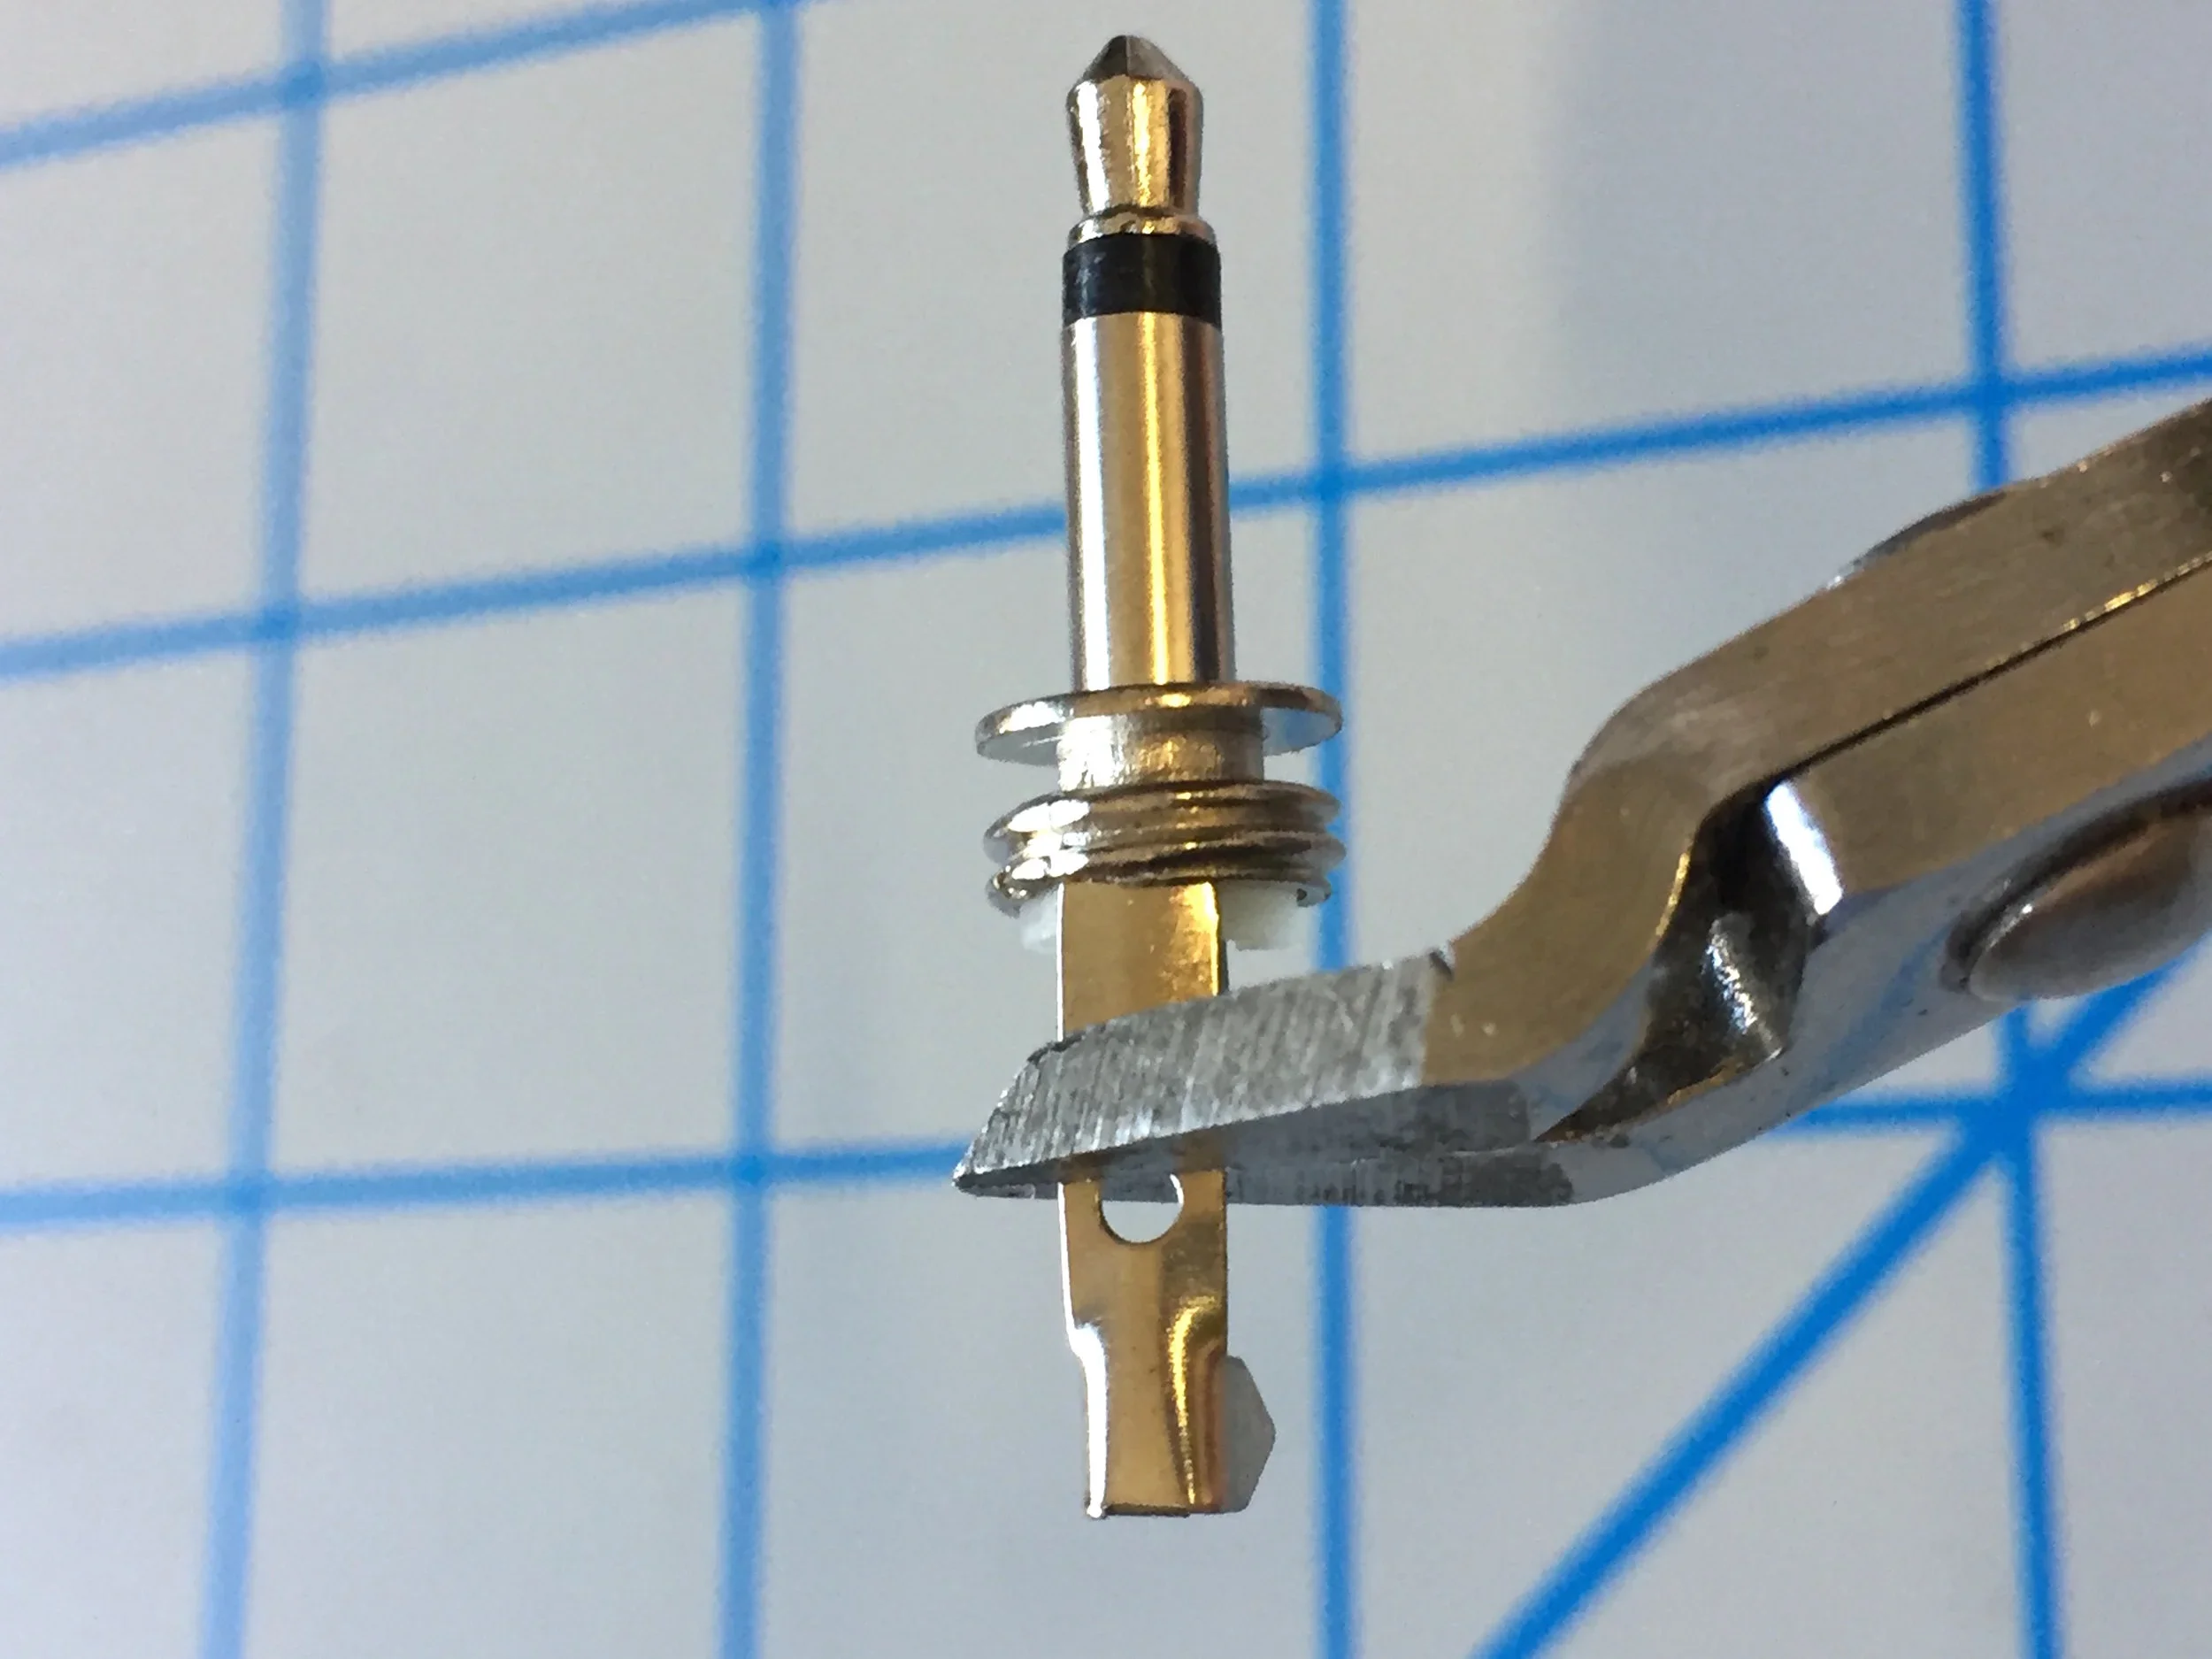
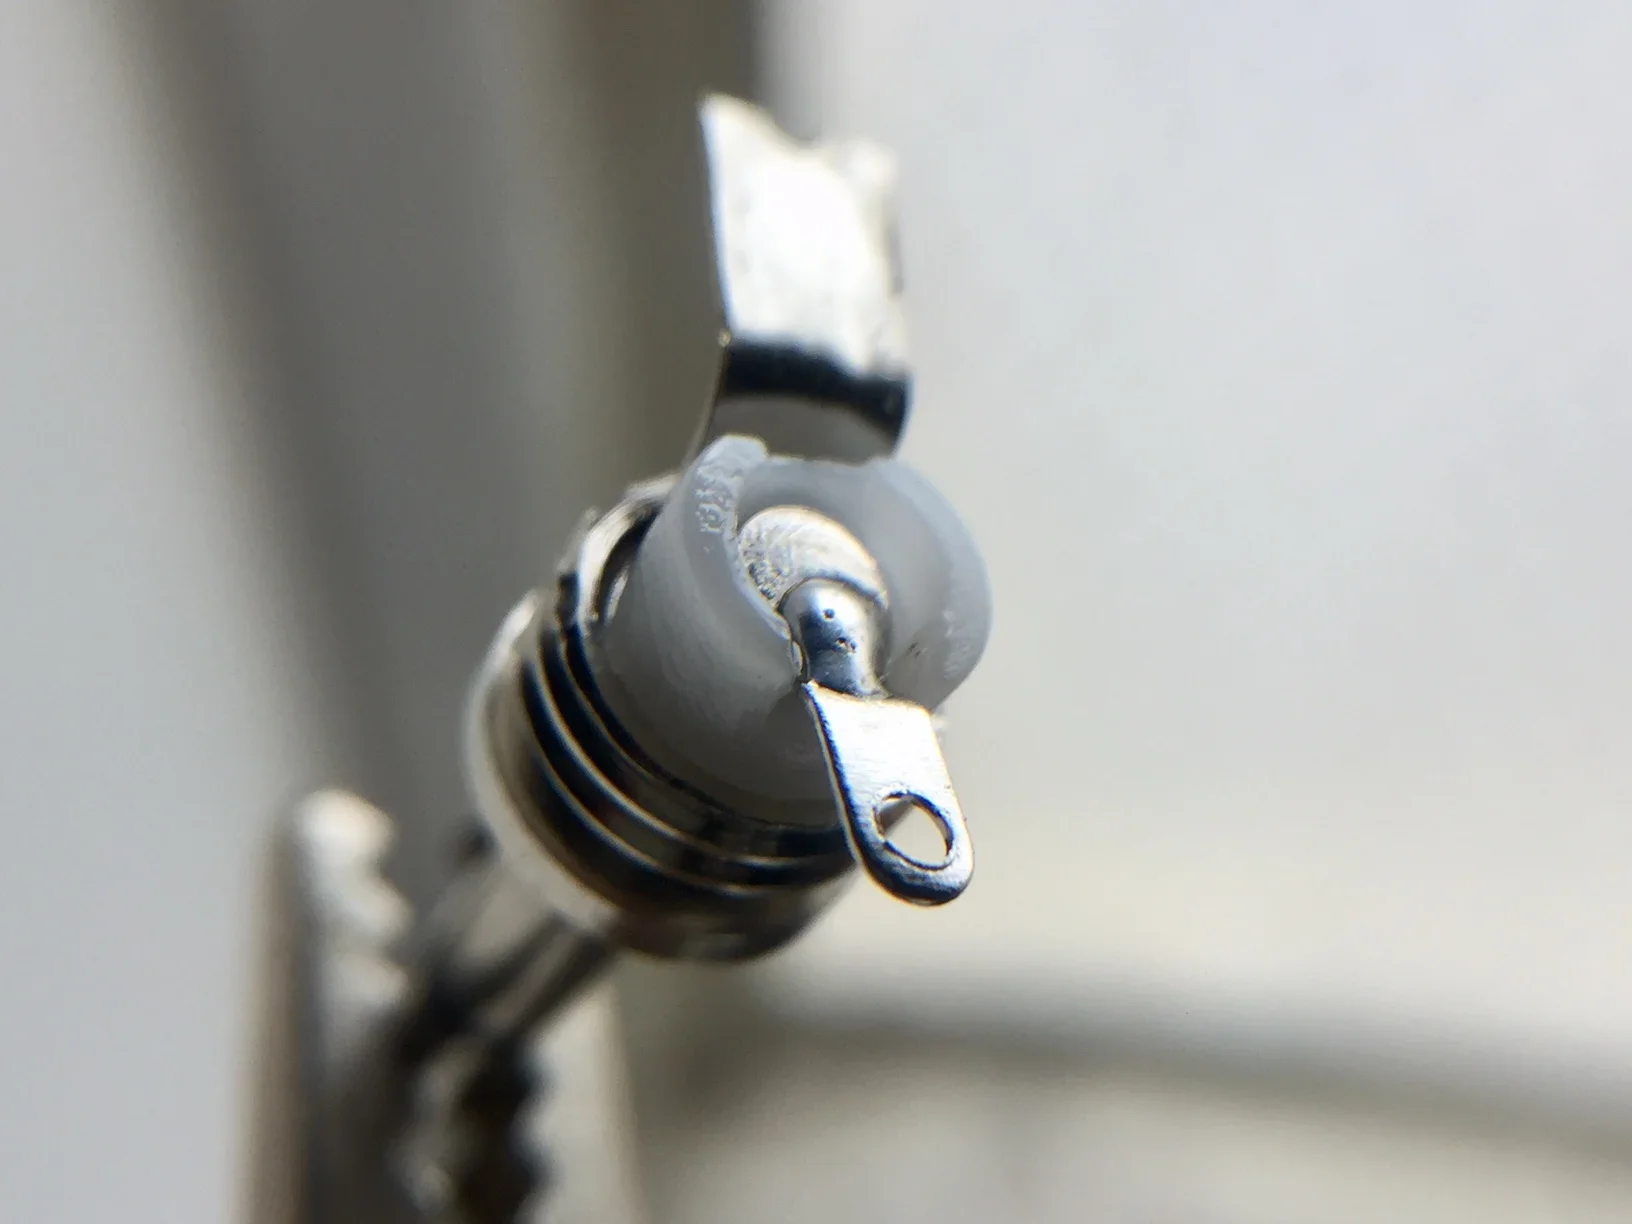
Using your clippers, trim only the ground connection lug (the larger one) of the plugs just below the circular cutout.
Using your pliers, bend both connection lugs outwards to a 90˚ angle flush with the rim of the white plastic spacer. Please take caution while soldering and bending the legs so there is space between the body (threading) of the plug and the solder applied to the solder lug.
Step 4
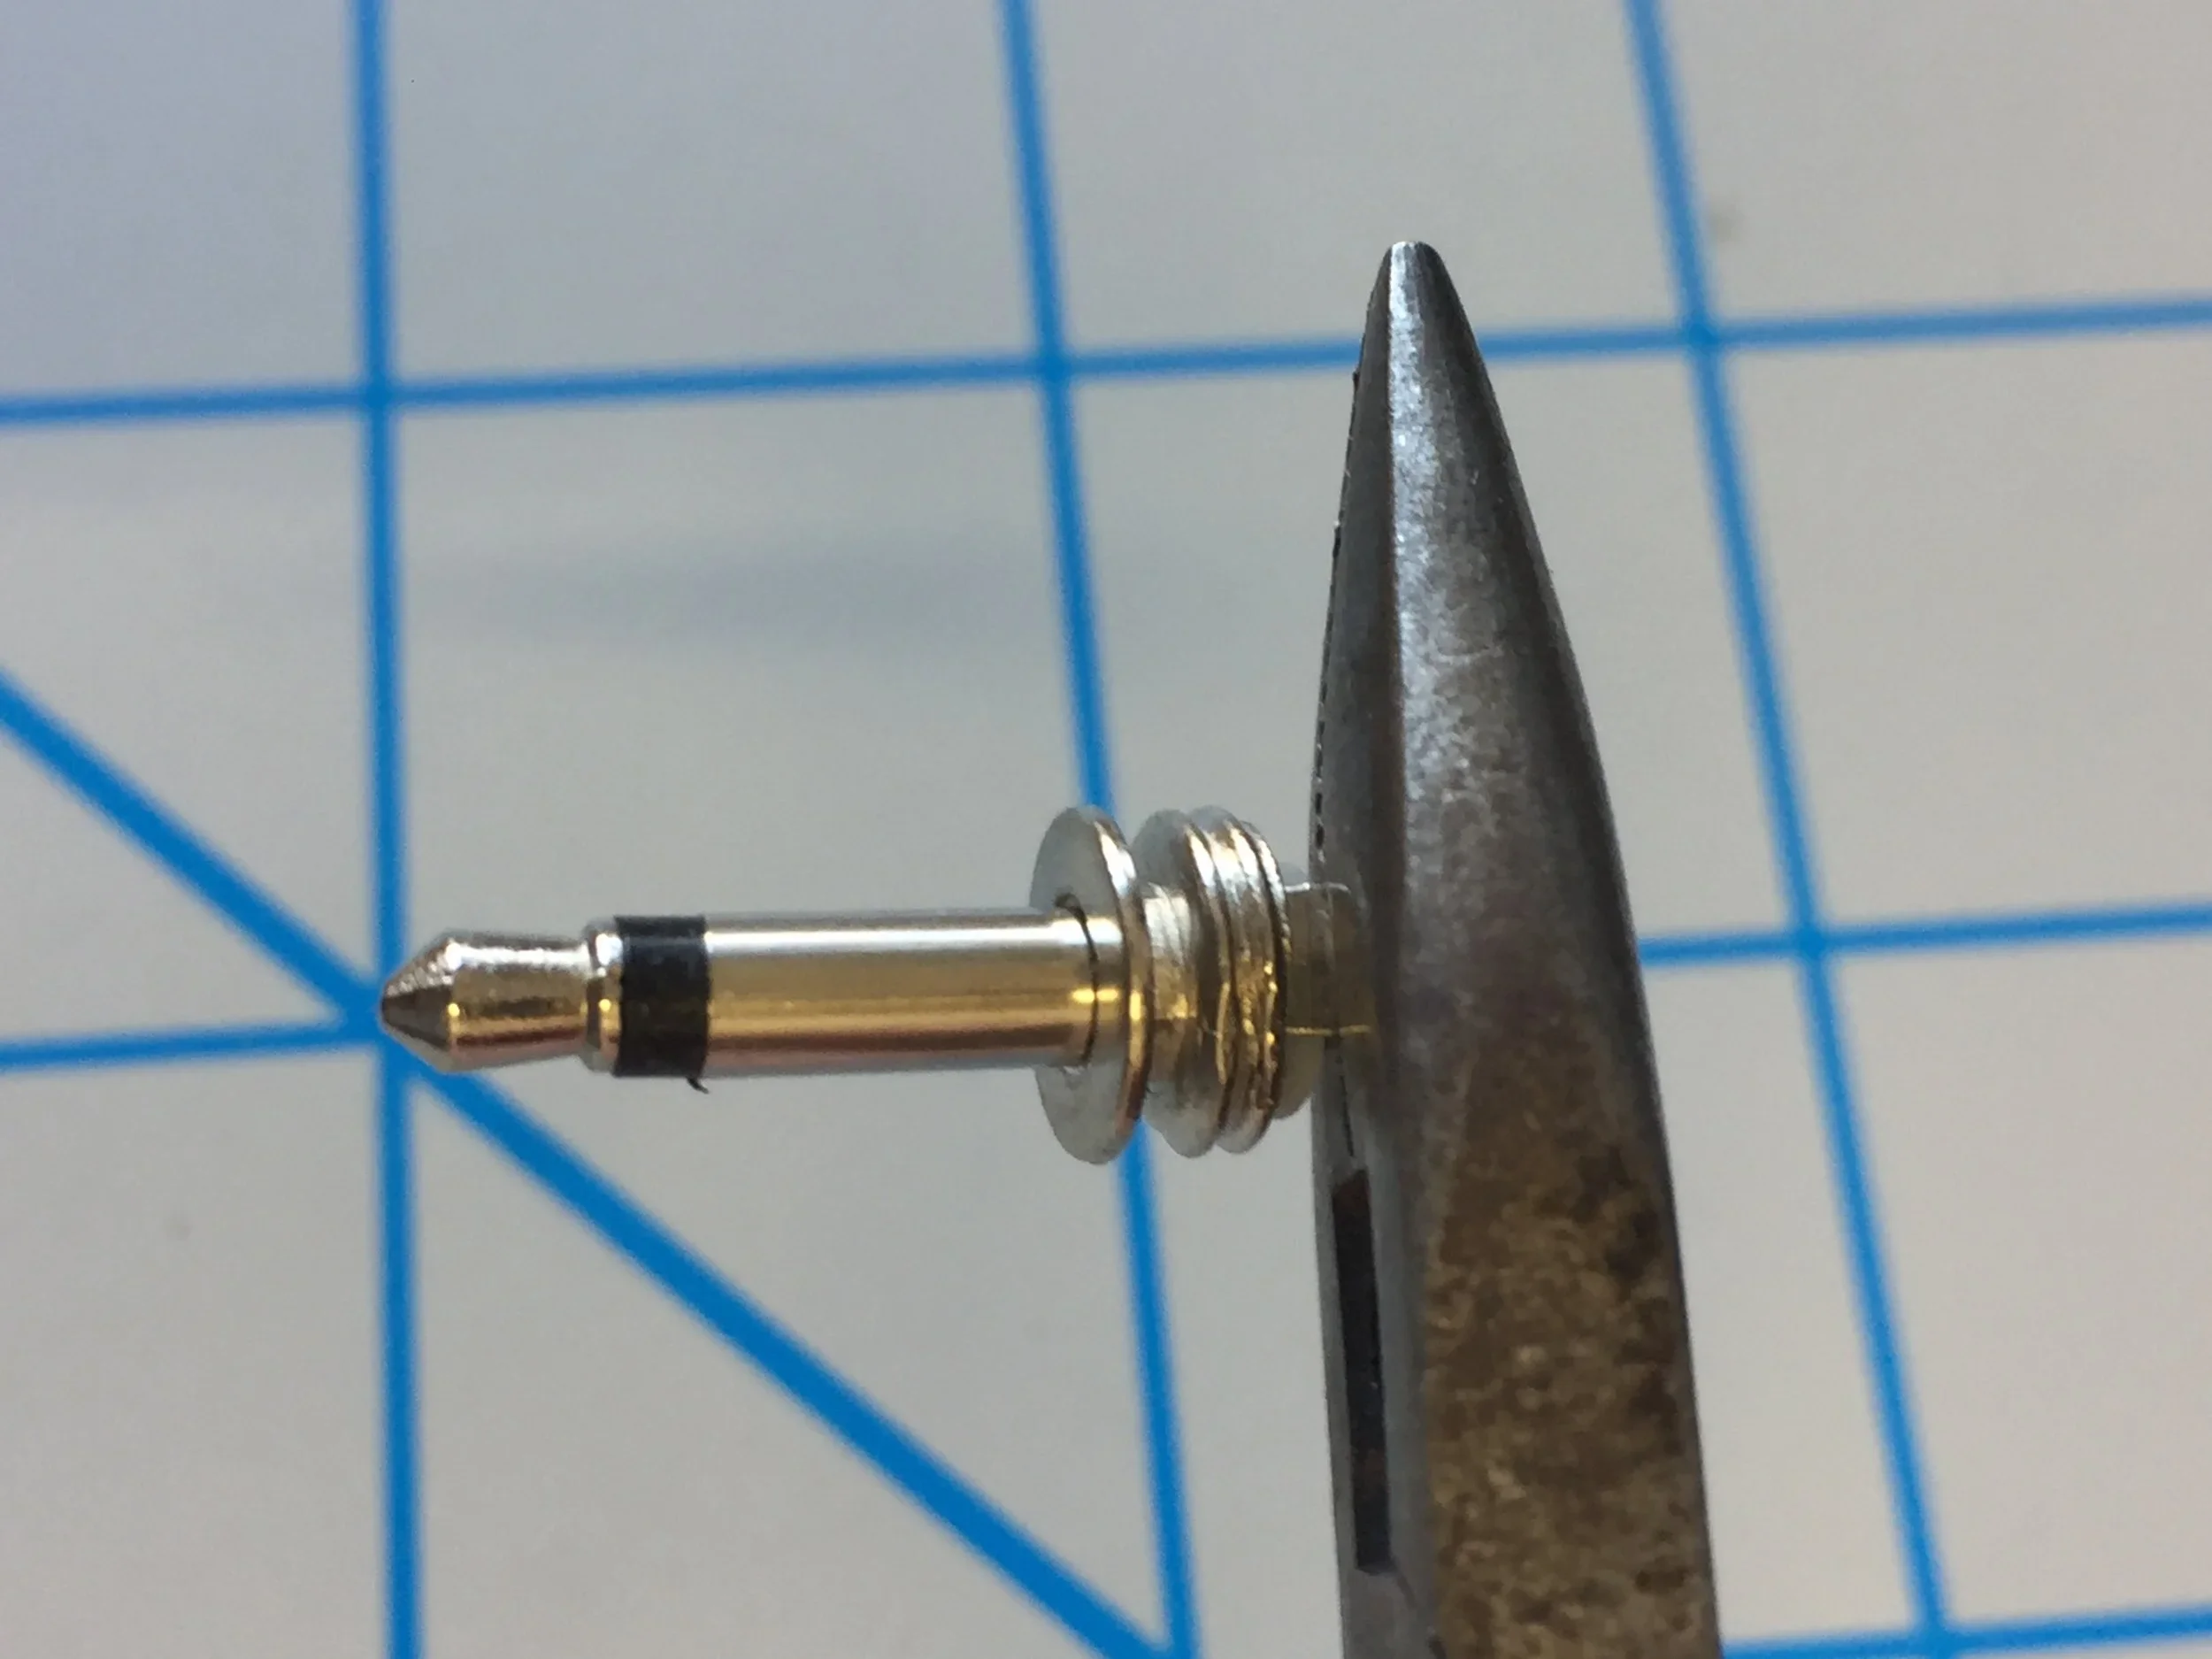
Check that each connection lug is inline with the bottom of the plastic after being bent so that it will stand flat and upright on the backside of the AllFlesh pcb surface. Note that the smaller solder lug has space between it and the underside of the body of the plug, this is important as it makes sure you don't introduce extra ground noise into your patch. Avoid spanning this space with solder during the soldering process!
Step 5
Use some thin solder to span/connect the center pin with the small lug as seen in this photo. That will give your plug extra strength and make it less vulnerable to damage from excess heat during the final soldering process.
Step 6
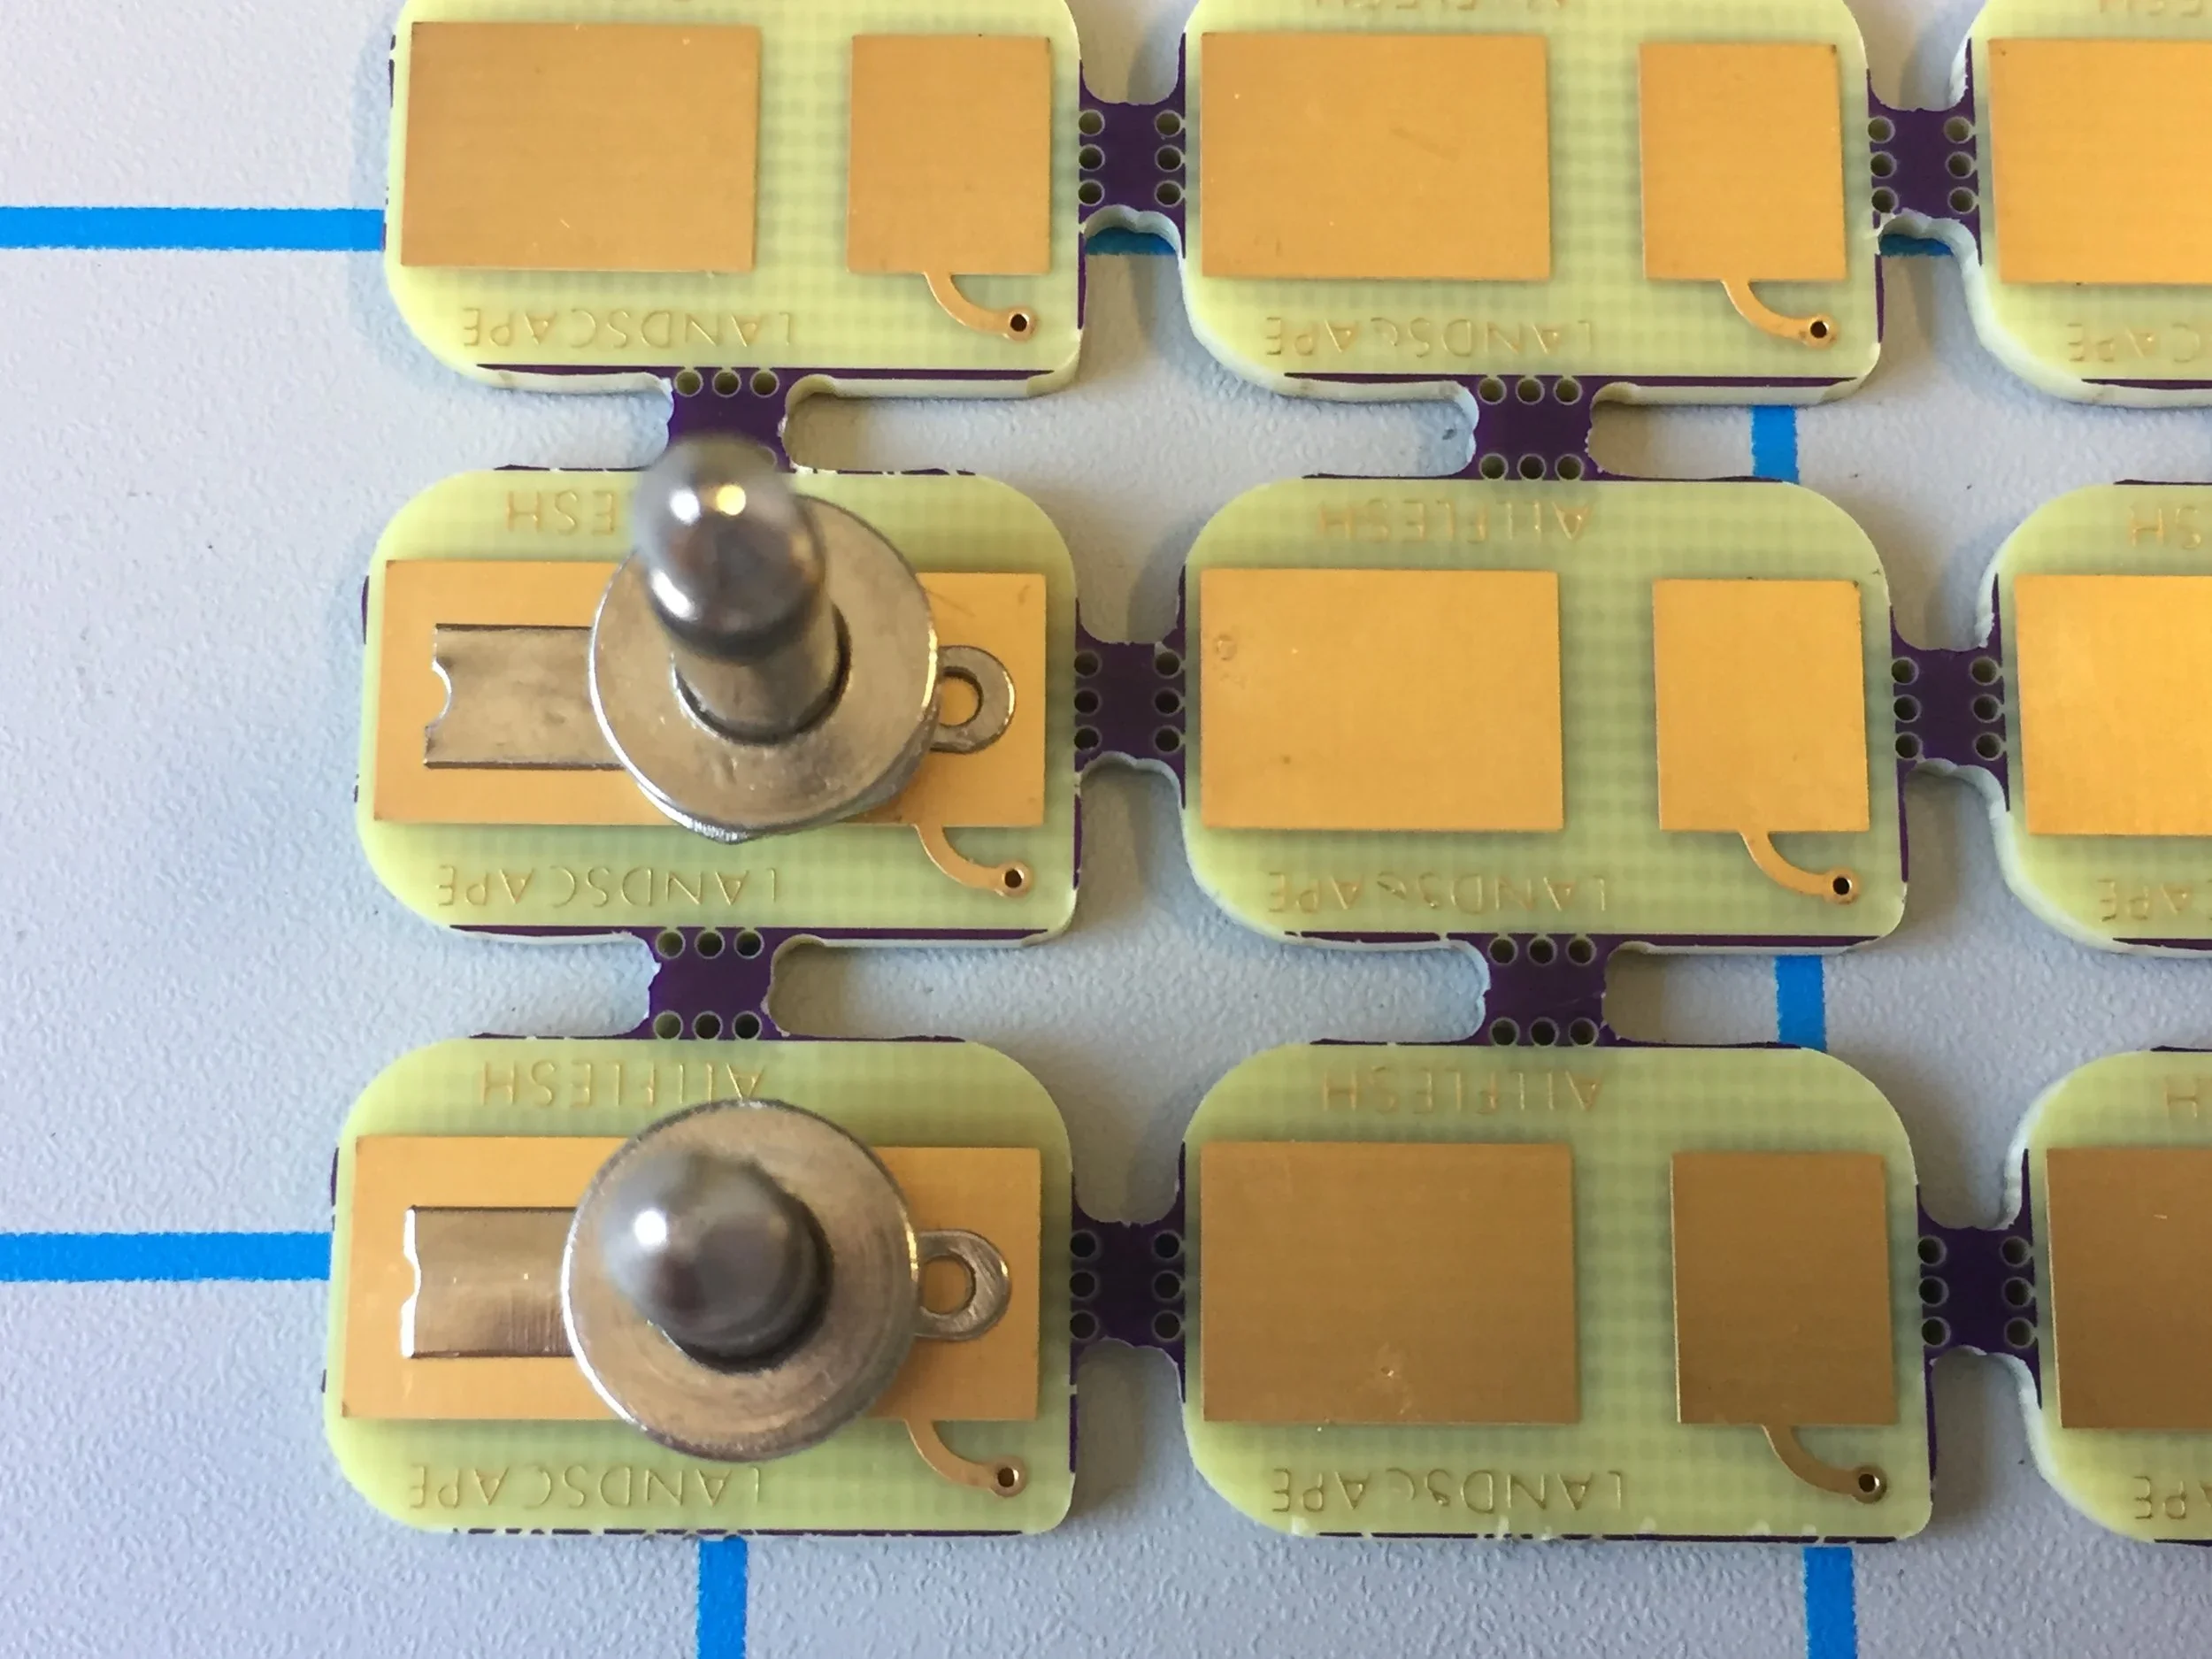
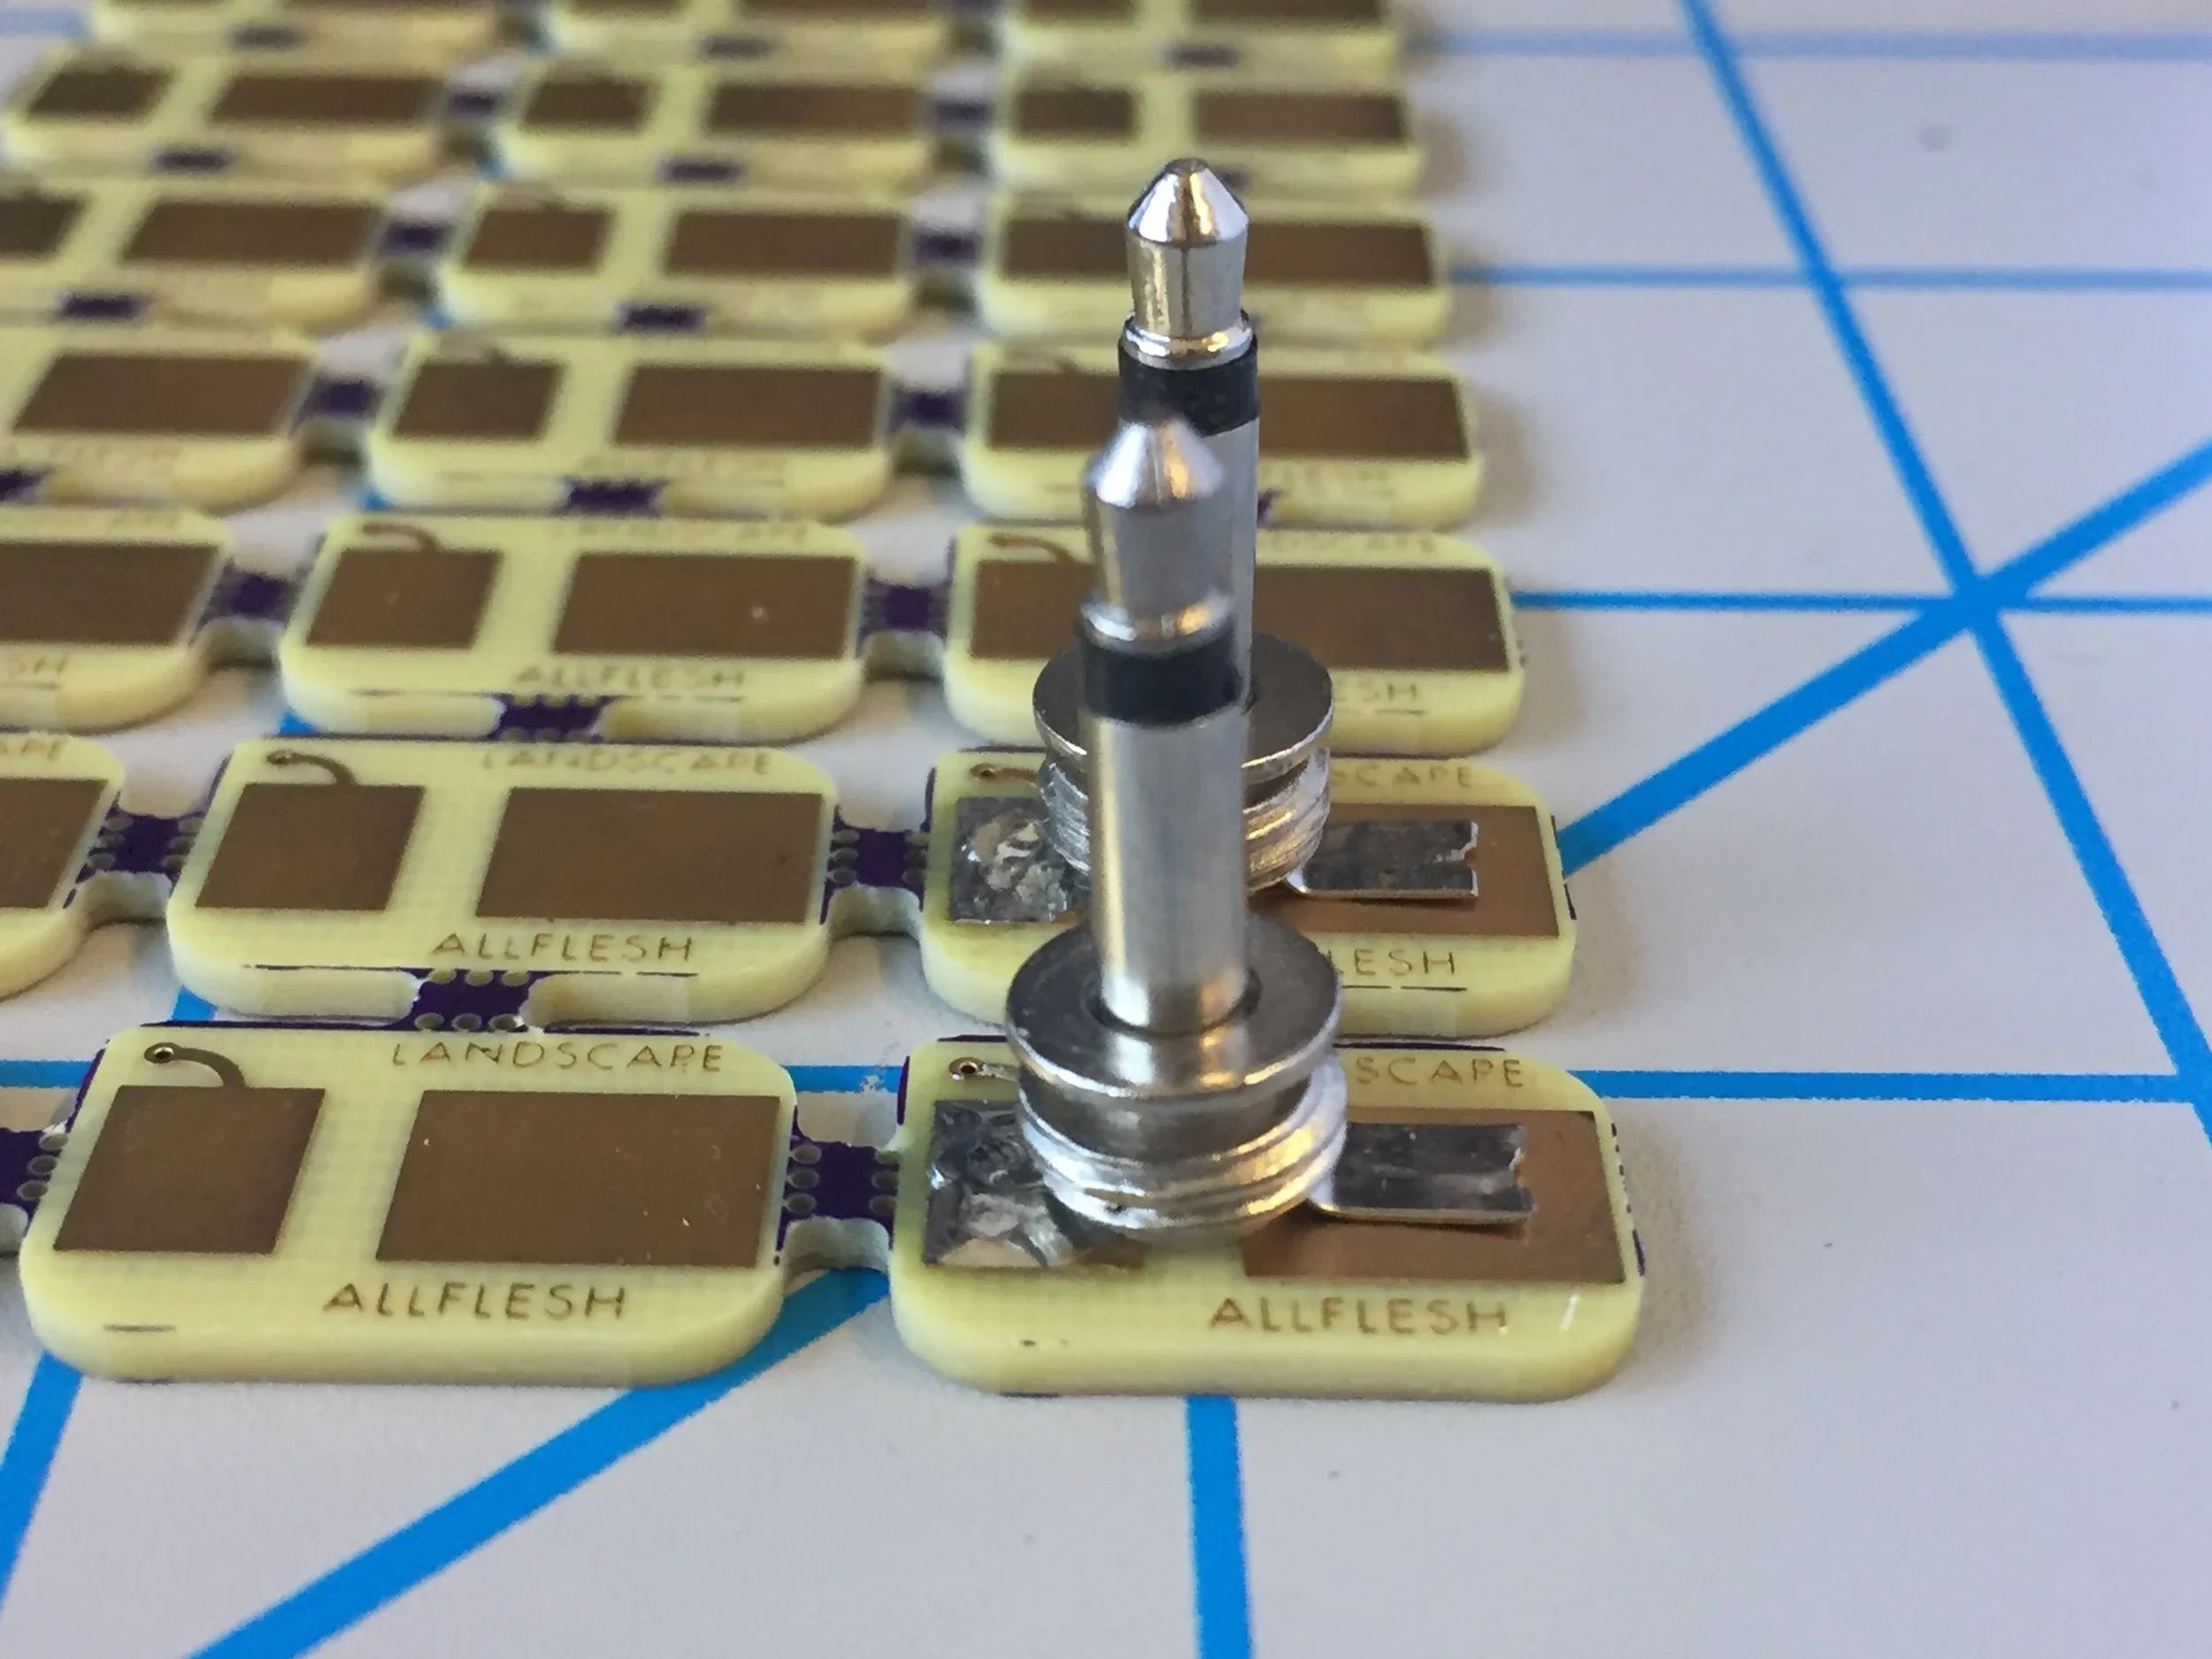
Place your plugs atop the pcb surface as pictured so that the center of the plug is in the space between the two large golden solder pads. Your plug should form a "T" shape standing up straight and perpendicular to the surface in both directions. The bent lugs of the plug should be flat against the gold solder pads with no airspace beneath them. Use your pliers to further flatten and adjust them at this step if needed.
Use your file to remove the jagged edges of the perforations. Make sure you don't breathe in the dust created in this step. Wear a mask or work outside. Optionally, you can use a continuity tester to make sure your solder connections between the tips of the plug and the surfaces of the touch plates are good. Next make sure your ground connections/larger pads are not short circuited to the tips/smaller pads. If you later find that one of your AllFlesh will not complete a hand patch connection, then reheat/reflow the smaller solder joint to achieve connection. All done!
Step 7
Prepare to solder. Warning!: Make sure you don't start soldering on a surface that could melt as seen here! The underside will heat up to become extremely hot during soldering and bad things can happen to your work surface as well as the AllFlesh touch surface. Use a PCB holder, or if you don’t have that, use cardboard or a clothing pin. See how I've left little gaps under the tips of the larger lugs? Don't be like me. Make them flat and nice. See how the plug in front is a little crooked? Maybe don't rush like I have. Make the plug nice and straight. Here you can see where to make the first solder connection, on the smaller lug, making sure that the solder covers and bonds to the lug while flowing across the front surface of the solder pad. Don't worry that solder doesn't go beneath the jack; that may actually be a good thing to avoid. The solder is what holds them together and since the solder area is pretty large they will be pretty sturdy when you're done. If they move during this step, reheat the solder and slide the plug back into proper position while taking care not to burn yourself on the body of the plug as it can become very hot!
Step 8
Step 3
After everything is aligned, solder the larger lugs but take caution as the plug's body and tip will get very hot during soldering. Make sure all edges are covered with solder. After they have sat for about two minutes they will be cool enough to handle. If you didn't break apart the pcbs before soldering (I know my images are misleading) use clippers on the perforations between boards and make sure to not apply pressure to the plugs themselves.
© 2015-2026 landscape